Hello everyone! Welcome to another project from My Tech Studio. Today we are going to build an Arduino Powered Robot. It is a 3-wheeled robot, which can be controlled by a remote control, or it can drive autonomously. It is a very interesting project and a great learning experience. There is a lot to cover so let’s get started!
Autonomous navigation car using arduino -
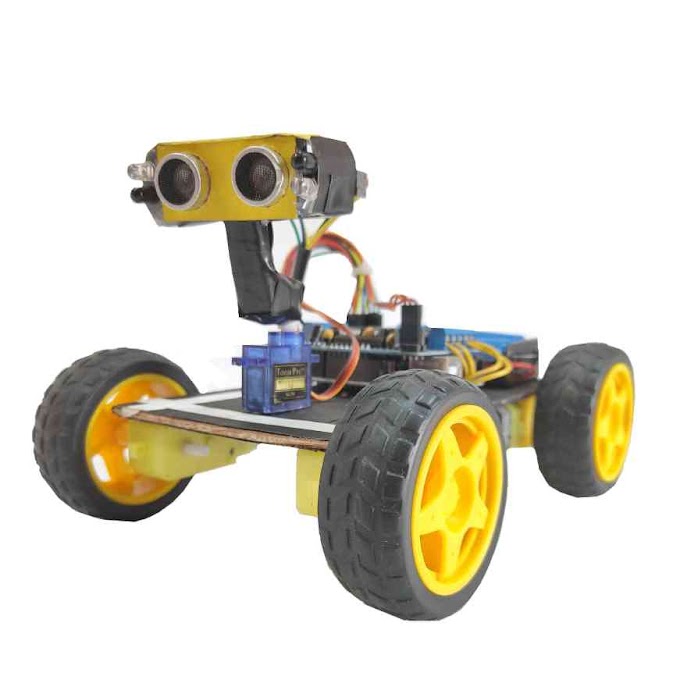
Today, we build a robot! A robot that can be controlled by an Arduino powered Remote control, or it can drive autonomously and avoid the obstacles using an ultrasonic sensor. There is also an exploration mode available where we can see the obstacle position in real time on our computer screen. Let’s start!

I think that this is very important because even a new comer can build this robot even with no Arduino experience. After about 2 hours the remote controlled version of the robot is ready. The electronics of the robot are very familiar. It uses an Arduino Uno, a motor shield and an NRF24L01 module in order to receive commands from the remote control and report back some data. The remote control also uses an Arduino Uno, and a custom made shield which has a joystick and some buttons, switches and potentiometers. As you can see, after programming both the robot and the remote control with the Arduino IDE, the project works great. With the joystick of the remote control we can drive the robot around with variable speed if we wish!

It is very responsive and since we are using 2 18650 batteries, it is very fast as well. I am really impressed by its performance and the looks of it. If you wish you can attach 2 more modules to the robot. The buzzer module and the RGB led module. So, now by pressing down the joystick we can enable the buzzer and we can change the color of the LED with these switches! Nice, isn’t it!
How to build autonomous car?
Now, let’s build the autonomous robot. We have to install the second servo and the ultrasonic sensor and load the second sketch. After powering up the robot, looks around, measures the distance of the surrounding obstacles and decides where to go. It is really fun to watch driving around the house itself. Of course, since the robot uses Arduino as its brains, we can write our own software for it easily. In this blog I am using only the software provided by the developer of the kit which works fine. The third sketch we can upload is the most interesting one in my opinion. We connect the remote control to the computer and we run the Processing sketch which comes with the robot.

Arduino self-driving car code -
Now, in the computer screen we can see live data from the ultrasonic sensor on the robot. The computer program visualizes the obstacles on the screen as green dots. So, we can drive the robot even without looking at it, simply by looking at the computer screen, as in the screen appears a representation of the environment that the robot senses! How cool is that! So, we can navigate through the obstacles without even looking at the robot. Since the robot uses the NRF24L01 which operates at the 2.4GHz band it can achieve a range of about 20-50m. If you wish to extend the range of the robot you can use the long range NRF24L01 modules with the signal amplifier chip and the external antenna.

For indoor use though, from my experience, this robot is ideal, you don’t need any extra range. As a final thought, I really like this 3-wheeled robot kit. It is very well designed, it has a great assembly manual, it offers 3 modes of operation, the code of it is open source so you can easily modify and extend it and it uses Arduino. I think that by building this robot, you will gain a deeper understanding of how simple robots work. I am going to study the code of the remote control part of the project in order to use some of the clever tricks the designer of the kit uses in our future projects, so stay tuned!